Yoo-hoo! It's that time of year again! Time for a birthday party!
With all of the cute owl stuff out there, I could not resist doing an owl party. I made these owl invitations to match. I love how the wings move by using mini brads. (I actually had to do that so they would fit in the envelope.)
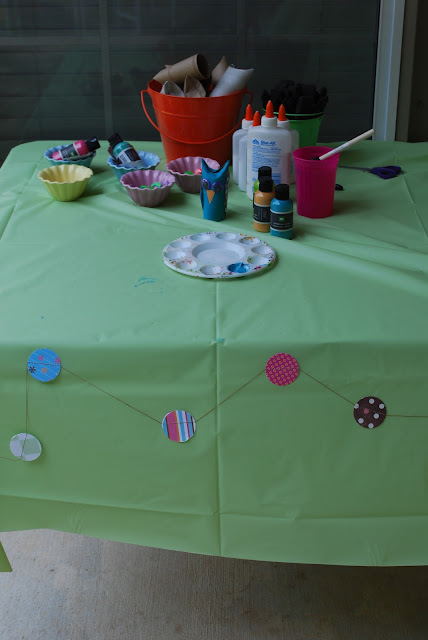
So glad I decided to use a round table this year. I found the plastic tablecloth at Target and was so happy that it was long! (That is not a cute table under there.) The napkins were held down with a wooden 8 from Hobby Lobby. The forks were contained in a small flower wall vase, which I have a small collection of. My sister, Jena, and I made the circle streamers with a circle punch, scrap paper, and sewing machine.
Good thing my mom knows how to make cakes, cause I am not prepared to dish out big bucks for something that gets eaten! The owl on top was a cookie.
Treat bags this year were a lot of work, but I loved them!! I stole the birdcage idea from a friend at work. She had a very similar cage with a chalkboard stuck in at a baby shower. I thought it would make a perfect spot for the goodie bags (since owls are birds, after all).
Party favors were paper owls sewn together to form a pouch with friendship bracelets and bottlecap magnets inside. The kids had to rip them open to get the treats.
You can't see it, but the little card said, "It's been a HOOT!" My daughter wrote those, and made the magnets with owl stickers and Glossy Accents (sold at Michael's.)
This "Use Your Noodle" game didn't work so well. Turns out, balloons don't like heat or dried out spiky grass. The kids had other games to play, thank goodness. But man, that was a lot work putting "M" stickers on those and cutting noodles. The important thing is, it was cute, right?
Owl Make and Take
I found this idea on Pinterest. I tried to make a link, but could not find this project. You just hot glue the top of the toilet paper tube down to make the shape of the owl. The kids get to paint and decorate. I used scraps of paper for wings and beaks and bought colored eyes from Michaels.
The ice block was a hit! I filled a plastic container with enough water to cover several trinkets and let it freeze. I then added another layer of water and toys and let that freeze. The problem was that the sides would melt when you poured more water on it, so we had to lift out the block, put toys and water under it, and then freeze again. This takes several days to complete. I bought a meat tenderizer for the kids to take turns breaking the ice. The tool broke after a few hits. I bought the $5 one from Target. Maybe a more expensive one would work or just a hammer. I didn't think an ice pick would be a good idea. An adult (or several) needs to stay close to supervise so that no one gets hurt.


I LOVE these invitations! I was wondering if you cared to share how to make them! We are doing an Owl Themed party for my daughters first birthday! :)
ReplyDeleteI wish I had a template to share, but I really just made a free hand pattern based off of the ones I saw at Snowy Bliss. (If you look closely, you can tell they are not perfect.) I used a circle cutter and two different sized circle punches for the eyes. I printed the words on cute paper and just cut it to make a shape that would fit on the body which was made to fit the envelope. I bought card envelopes from Office Depot. The wings were just shaped and cut until they were a size that worked. If you want to send me your address, I can mail you one that you can take apart and trace. Thanks for looking!! Hope your party is memorable!
Delete