If your husband is sporty or owns a boat, this Speedo submersion sports towel is a great gift. I found this at Target.
My sweet neighbors are getting cones stuffed with Dove chocolates.
I used more of my Crate Paper Love Notes stash from Tuesday Morning to make these Valentine's Day tussie mussies.
I made this little cutie for my little cutie. Now that I have a sewing machine, this was unbelievably easy. Flipagram tutorial on my Instagram account.
Inside, I stuffed a manicure kit complete with a set of Valentine's Jamberry nails, alcohol wipes, an orange stick, and a rice pillow to heat in the microwave and apply the nails.
The planner lover in your life will love this paisley paperclip. Listed in my etsy shop.
My kid's teachers are getting these for Valentine's Day. Can you guess what it is?
It is a velvet heart shaped scarf hanger! I love it. Who doesn't need a place to hang scarves? I think they are the perfect teacher gift for Valentine's Day.
And what doesn't look cuter with a ribbon and tag on it?
I used Crate Paper's Love Notes collection to make these cards.
My new fringe scissors came in handy for this one.
This little chipboard heart needed a little color, so I raided my daughter's stash and found a princess paint pen. I love the aqua pearlized touch.
Doilies make valentines cuter! And mini puffy heart stickers! I used the sewing machine on this one. The mini clothespins from Target Dollar Spot were the perfect touch.
The Slice Machine was used to cut the heart out of the center of the pink ombre paper.
A Basic Grey chipboard frame covered in more princess paint completed this one.
Mini alpha stickers worked perfectly.
Letters and hearts were cut from patterned paper to make this card.
This banner was much cuter in person, but you can only do so much with a cell phone camera. This actually turned out to be one of my favorite banners ever. I used a Tim Holtz mask on tags to distress the letters of the baby's name. The set of alphabet masks came with different fonts which I like.
Above the table, I hung some grapevine and Chinese lanterns. These are easy to make. I have a tool, but I remember making these in elementary school. If you could look closely at the paper design, there are some crowns on some. Since we did not really have a certain theme, I used my Slice machine (am I the only one that has one of these?) to cut some large crowns in the same paper to put sort of like confetti on the tables. No pictures of those, sorry.
(This is the teacher's lounge at school, not my house. It was decorated nicely by some of the staff, but the ceiling sure is ugly.)
One of my friends had the idea to have a "Pinterest Party" and it sounded like fun, so I did. Inspiration for this DIY banner came from creative chaos. That girl is good with glitter.
Each guest found her seat by looking for her initial in the glitter tray. I made little bags to put all of the ingredients in.
What's a craft party without lots of candy?? In fall colors, of course!
I even wrote the steps to make the banner on my ginormous Ballard Designs Knockoff chalkboard. If you don't know why the first two steps are crossed out, you may need to check out Youtube more often.
For some reason, I have made a new banner for Halloween every year. I don't have banners for every holiday, but Halloween always gets one. I guess Halloween is the only holiday I am not too busy with other things to make crafts. Here is the 2012 version. I used old book paper, orange crepe paper streamers, scrapbook paper, silver white gold glitter and letters cut with my Slice machine. I love all of the fonts you can get with Slice Machine cartridges.
This would be cute to have kids hold up for Halloween costume pictures. Especially ghost costumes.
Check out last year's banner here.
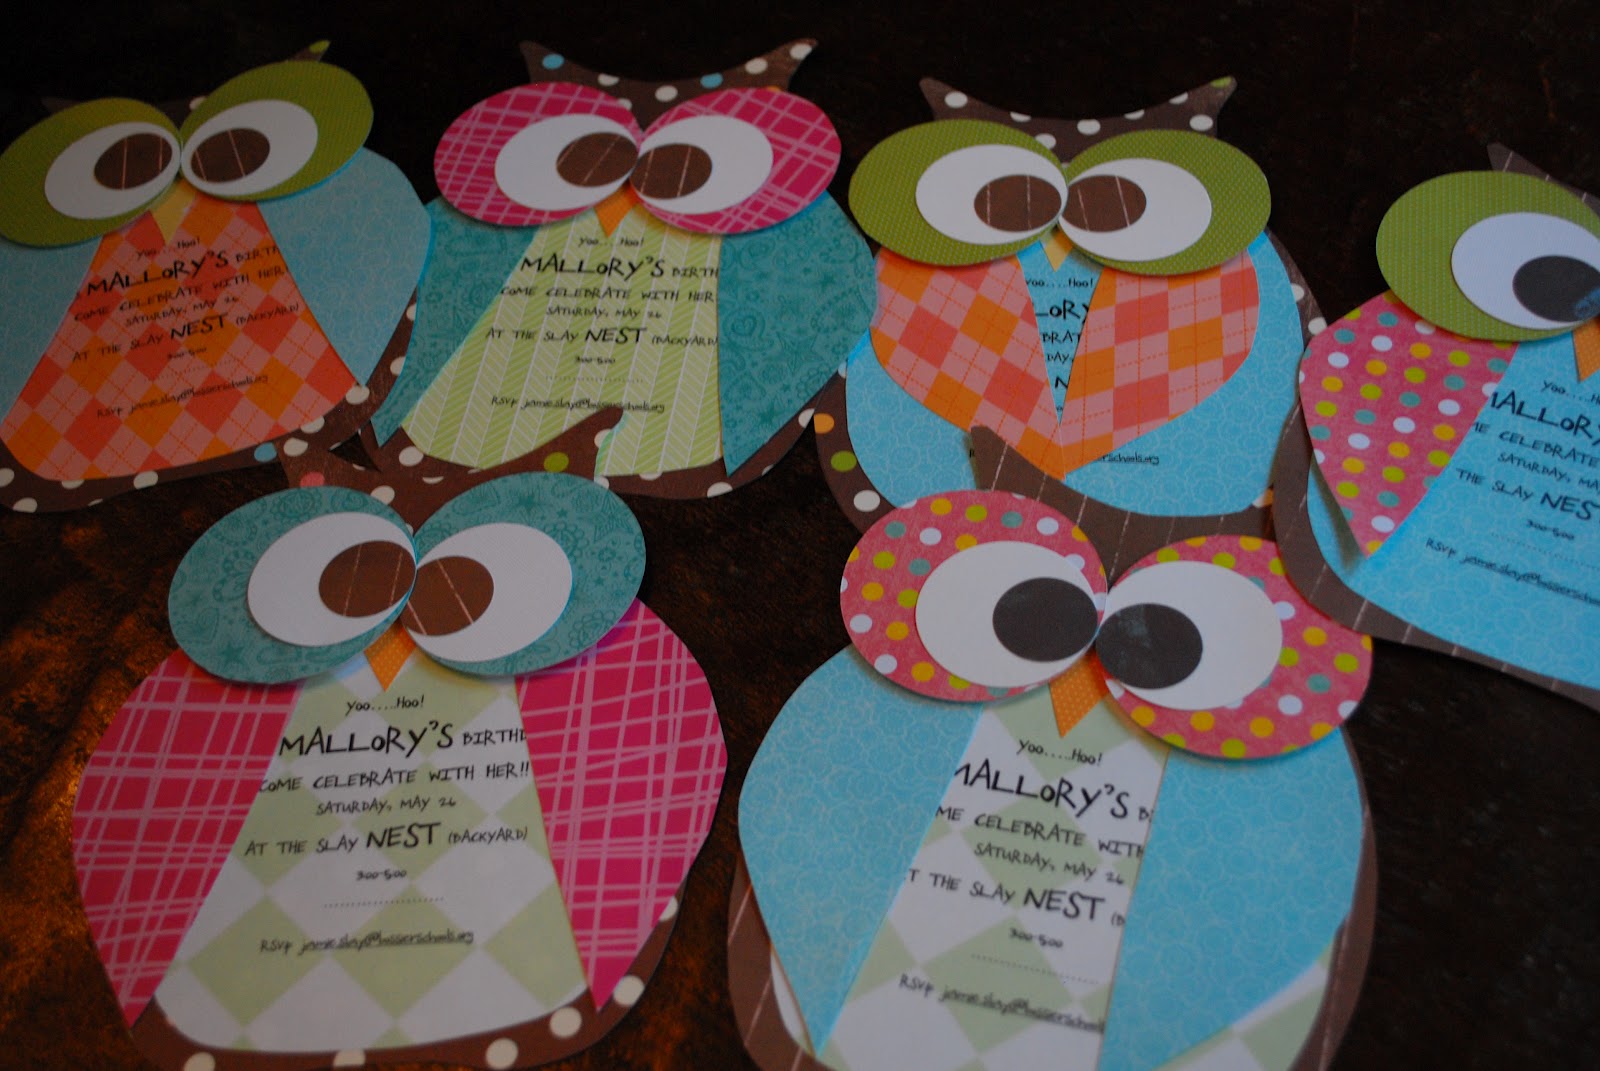
Yoo-hoo! It's that time of year again! Time for a birthday party!
With all of the cute owl stuff out there, I could not resist doing an owl party. I made these owl invitations to match. I love how the wings move by using mini brads. (I actually had to do that so they would fit in the envelope.)
Foam squares under the eyes make them pop. Inspiration came from here.
So glad I decided to use a round table this year. I found the plastic tablecloth at Target and was so happy that it was long! (That is not a cute table under there.) The napkins were held down with a wooden 8 from Hobby Lobby. The forks were contained in a small flower wall vase, which I have a small collection of. My sister, Jena, and I made the circle streamers with a circle punch, scrap paper, and sewing machine.
Good thing my mom knows how to make cakes, cause I am not prepared to dish out big bucks for something that gets eaten! The owl on top was a cookie.
This is one of my favorite birthday banners ever. I used real doilies under the letters for more texture. The letters were cut with the "Vintage Findings" cartridge for the Slice machine. I love this color scheme. Love the long satin ribbons (my sister's idea.) The best part? I already had all of the supplies for it!
Treat bags this year were a lot of work, but I loved them!! I stole the birdcage idea from a friend at work. She had a very similar cage with a chalkboard stuck in at a baby shower. I thought it would make a perfect spot for the goodie bags (since owls are birds, after all).
Party favors were paper owls sewn together to form a pouch with friendship bracelets and bottlecap magnets inside. The kids had to rip them open to get the treats.
You can't see it, but the little card said, "It's been a HOOT!" My daughter wrote those, and made the magnets with owl stickers and Glossy Accents (sold at Michael's.)
This "Use Your Noodle" game didn't work so well. Turns out, balloons don't like heat or dried out spiky grass. The kids had other games to play, thank goodness. But man, that was a lot work putting "M" stickers on those and cutting noodles. The important thing is, it was cute, right?
Owl Make and Take
I found this idea on Pinterest. I tried to make a link, but could not find this project. You just hot glue the top of the toilet paper tube down to make the shape of the owl. The kids get to paint and decorate. I used scraps of paper for wings and beaks and bought colored eyes from Michaels.
The ice block was a hit! I filled a plastic container with enough water to cover several trinkets and let it freeze. I then added another layer of water and toys and let that freeze. The problem was that the sides would melt when you poured more water on it, so we had to lift out the block, put toys and water under it, and then freeze again. This takes several days to complete. I bought a meat tenderizer for the kids to take turns breaking the ice. The tool broke after a few hits. I bought the $5 one from Target. Maybe a more expensive one would work or just a hammer. I didn't think an ice pick would be a good idea. An adult (or several) needs to stay close to supervise so that no one gets hurt.
Why is it so fun to get or give a gift basket? Or in this case gift bucket?
I made this for a friend in the hospital after delivering her baby girl. Someone told me about a recipe for chicken soup using 6 canned goods. I tried it and liked it. So, I thought maybe it would make a good gift. Especially if it is wrapped in a super cute green bucket from the dollar bins at Target. (It was actually $2.50, but still a great deal.) You'll never guess what I made the monogram with. Shelf liner!! Shhhhh! don't tell my secrets! It was on clearance at Michael's so I bought several different patterns because I just knew it would work like vinyl cut with my Slice machine or Cricut.
I added a bag of Fritos and a cute recipe card to the basket. You could even add shredded cheese to the gift basket if you are delivering to the recipient's home. Everything for a complete meal without having to try too hard. Everything goes in one pot. No need to remember to thaw something or dirty lots of dishes if you seriously don't feel like cooking OR going out. Or having pizza delivered. Am I the only girl in America that doesn't care for pizza much?
6 Can Taco Soup:
Rotel
Whole Kernel Corn
Black Beans
Chicken Broth
Can of Chicken
Cream of Chicken soup
+ Taco Seasoning packet
Mix all ingredients in a pot and simmer.
(Most of the time, I actually cook chicken in the pot first and then add all ingredients except canned chicken. In a pinch, it works with canned chicken.)
Christmas. The season of giving. I saw an advent calendar at www.janethopkins.com that inspired me to make tags for the twelve days of Christmas to attach to gifts for my little girl's teacher.
Every day until we get off of school for the holidays, she will receive a small gift and a handmade tag. I found gifts for under $5 each like a can of Altoids or poinsettia mini kleenex.
I love how they look all together on my crib spring. (Should've made myself a set. But that is a lot of glittering, folks. I highly recommend doing all of the glittering at one time. But I never think of these things ahead of time. No, I cut out all but two of the figures with my Slice machine. Then, glittered those. Then, made those tags. THEN decided to cut the rest and glitter and now my studio is officially full of bling.)
I think the number 11 tag is my favorite. I used old dictionary paper glued to the tag and ripped off the edges after it dried. I like how it worked out that the church is in the background. The edges of most tags were distressed with Tim Holtz green or tea inks. This one was spritzed with olive glimmer mist. For those of you that can't read blurry stamping, the red says "Pipers Piping". I think I am definitely going to invest in a better red stamp pad. This one was not dark enough and blurred on the paper. Not cool.
If you are like us, you go crazy with the birthday theme!
Jojo made this cute bag for my daughter's birthday gift since she had a butterfly themed girl birthday party. She put tulle under a cupcake liner flower with a butterfly cut with my Slice machine on top. Have you ever made flowers with cupcake liners? So easy!
I'm pretty sure this was a recycled bag that had permanent marker written on the front. Shhh! Don't tell. Go Green, ya'll!!
You can see more of the butterfly birthday party here. And here. Annnnnd here. Obnoxious, I know.
You saw the invitations, the banner, what we ate, here is what we did at the butterfly birthday party:
I spray-painted some old frames I got from a consignment sale for almost nothing because they had no glass in them. These made a cute photo booth. (The flower was made from napkins. We had those hanging from trees, etc.)
I set up my daughter's table outside for arts and crafts. They are hard to see on the white table, but I found peel and stick butterflies at Michael's for guests to decorate with tissue squares. The squares were in little flower bowls that I found at the dollar section of Target. Quick, easy, and no glue mess.
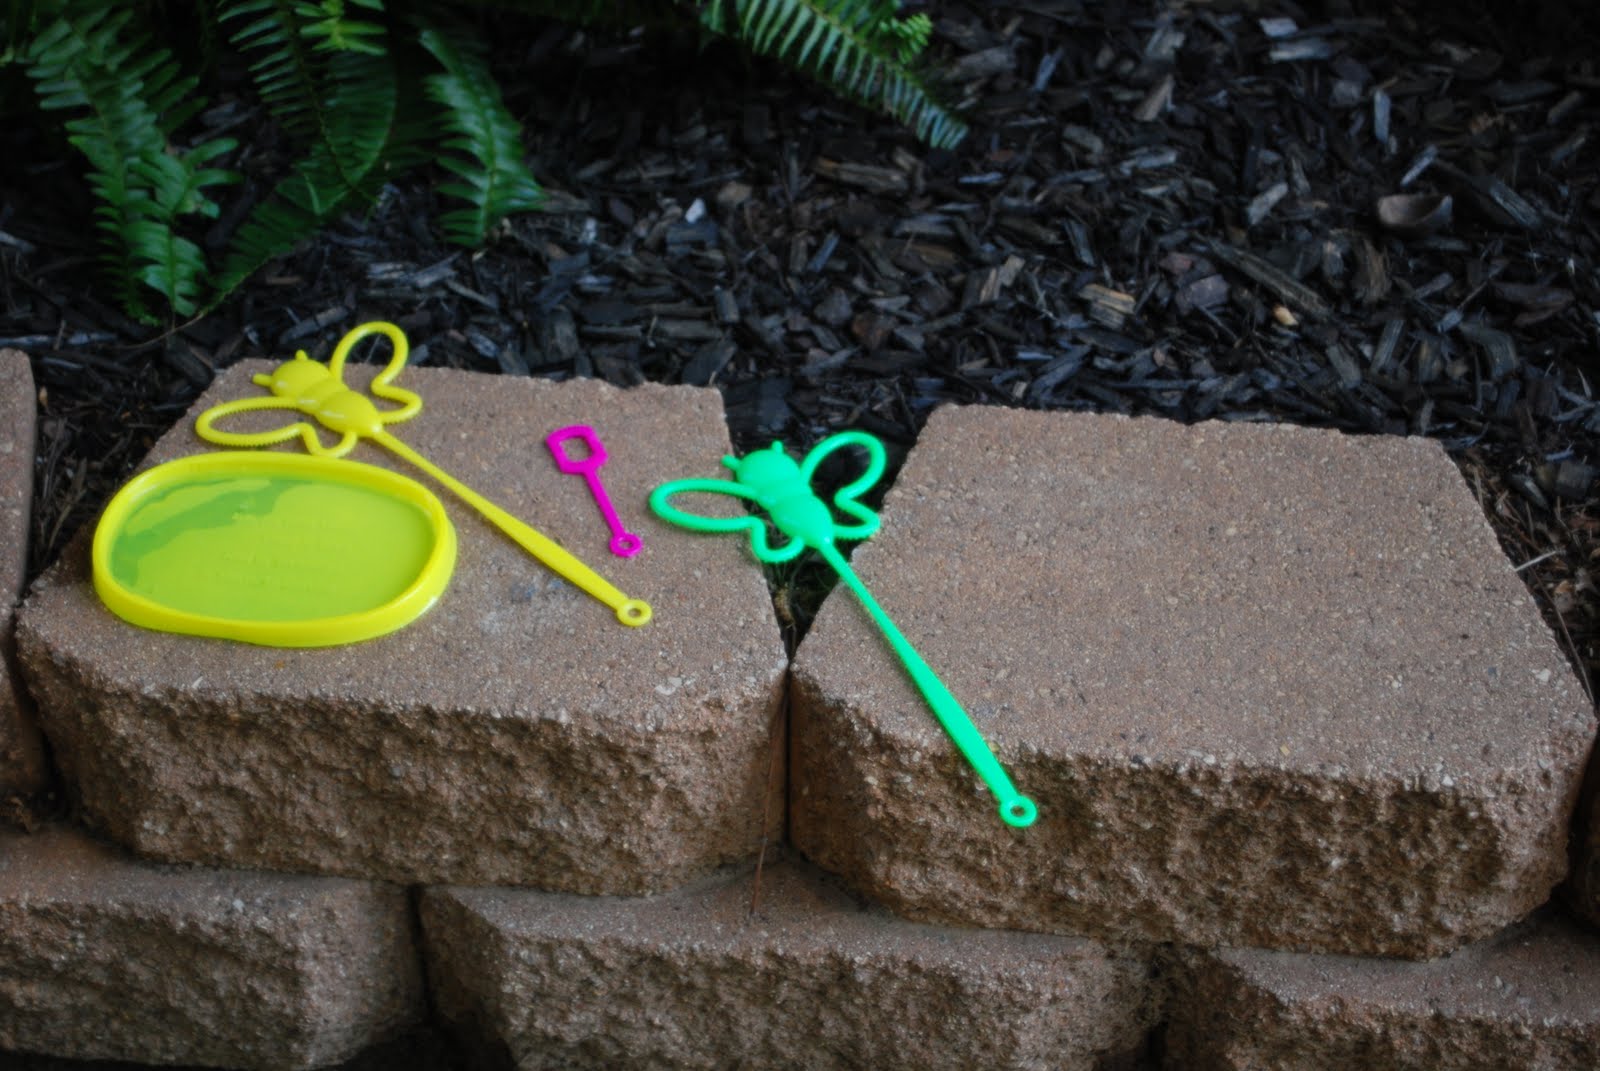
What's a butterfly party without butterfly bubbles? I found these at Dollar Tree. It's amazing how long cheap bubbles will keep kids entertained.
We made a Hula Hoop Garden, which was decorated with paper napkin flowers and butterflies, but I took the picture before that. They are hanging from garden stakes, or "shepherd's poles" if you are JoJo. The hoops came from Dollar Tree, also. They do not last long, but if you only need them a couple hours, they work fine.
The "goodie bag" was a butterfly net, again, from Dollar Tree. When guests left, we put butterfly sidewalk chalk from Target and butterfly bath fizzies from Michael's in them. Also, clear cellophane bags filled with candy from the dessert bar. We stuck the nets in a yellow can that I had from her first birthday, but I still see those at places like Hobby Lobby.
My girlie picked out the color combinations for the tags and ribbons and wrote thank-you on each one. I think they turned out super cute!
The kids used the nets to catch butterflies from the Elefun game. It was very windy so some of the butterflies flew into the woods. Oh, well. It also made all the butterflies that we stuck to the bricks fly off, so I never got a pic of that. We stuck butterflies everywhere. On the chairs, the poles, swings, walls, even on some rocks. That is why I had to cut so many with my Slice machine.
You can see the birthday banner from this party here. Butterfly Barbie cake (some would call her a fairy, but not us because this was not a fairy party) here. Invitations here. And more here.
If this party inspires you, I would love to see it!


