Monday, May 30, 2011

Butterfly Party Activities

You saw the invitations, the banner, what we ate, here is what we did at the butterfly birthday party:


I spray-painted some old frames I got from a consignment sale for almost nothing because they had no glass in them. These made a cute photo booth.  (The flower was made from napkins. We had those hanging from trees, etc.)


I set up my daughter's table outside for arts and crafts.  They are hard to see on the white table, but I found peel and stick butterflies at Michael's for guests to decorate with tissue squares.  The squares were in little flower bowls that I found at the dollar section of Target.  Quick, easy, and no glue mess.


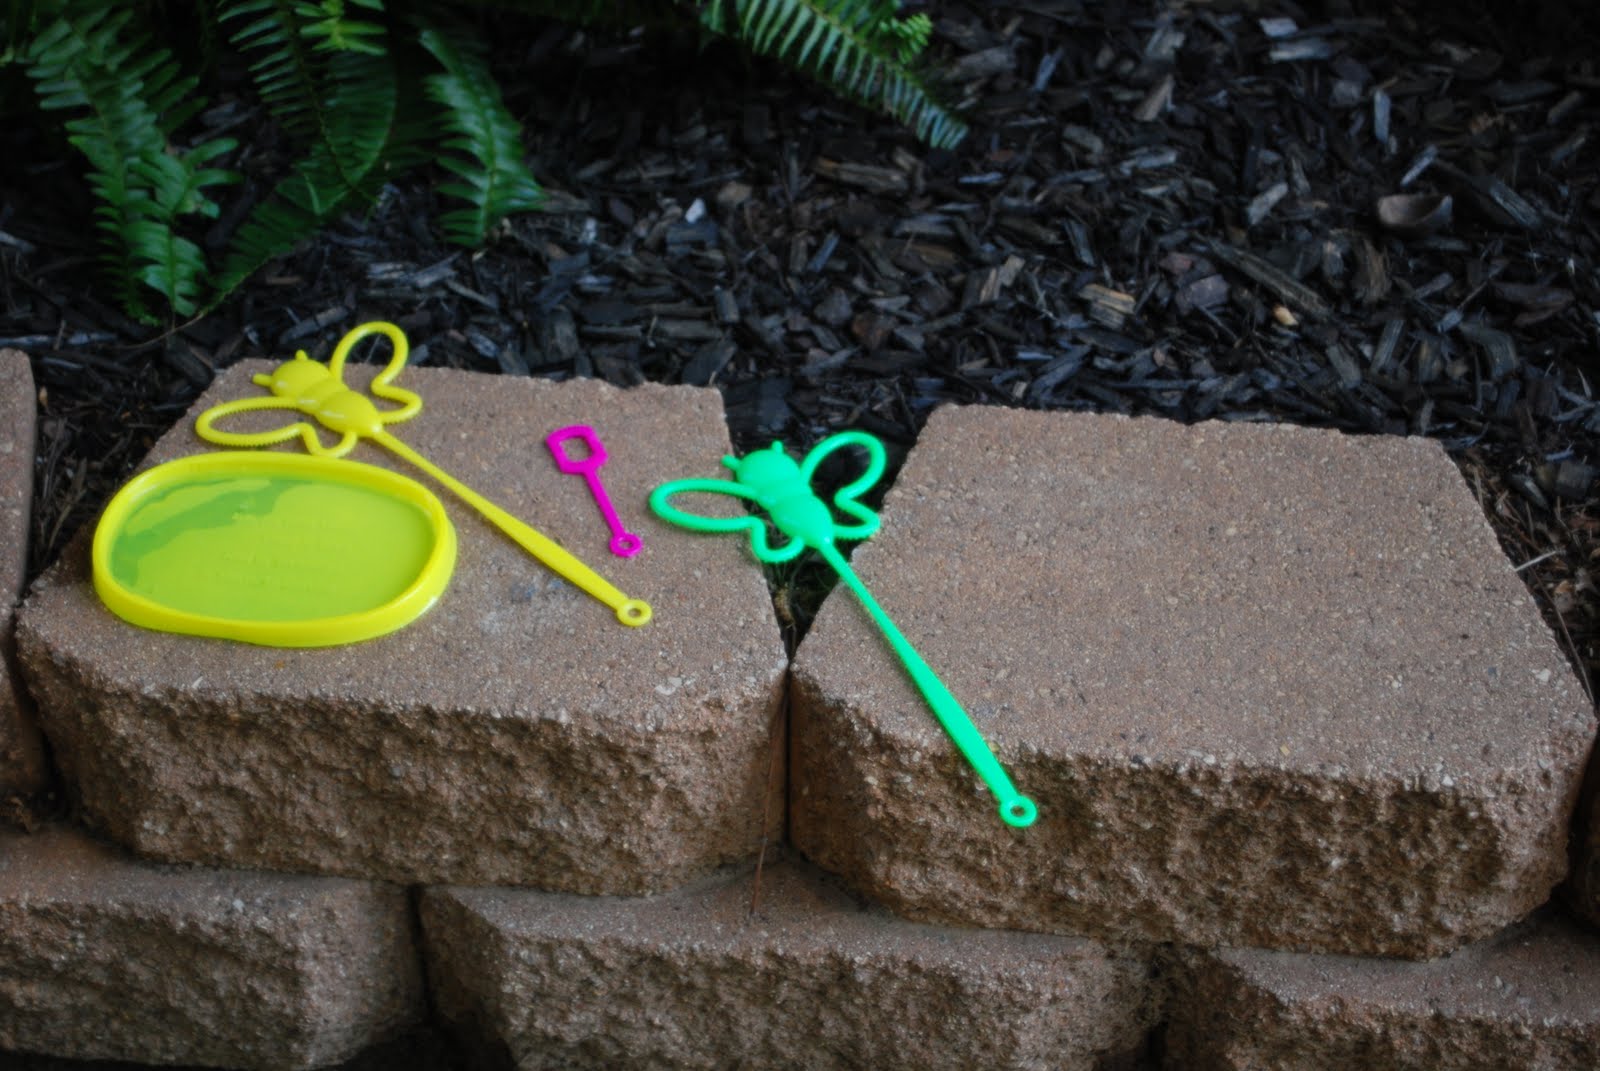
What's a butterfly party without butterfly bubbles?  I found these at Dollar Tree.  It's amazing how long cheap bubbles will keep kids entertained.


We made a Hula Hoop Garden, which was decorated with paper napkin flowers and butterflies, but I took the picture before that.  They are hanging from garden stakes, or "shepherd's poles" if you are JoJo.  The hoops came from Dollar Tree, also.  They do not last long, but if you only need them a couple hours, they work fine.


The "goodie bag"  was a butterfly net, again, from Dollar Tree.  When guests left, we put butterfly sidewalk chalk from Target and butterfly bath fizzies from Michael's in them.  Also, clear cellophane bags filled with candy from the dessert bar.  We stuck the nets in a yellow can that I had from her first birthday, but I still see those at places like Hobby Lobby. 


My girlie picked out the color combinations for the tags and ribbons and wrote thank-you on each one.  I think they turned out super cute! 


The kids used the nets to catch butterflies from the Elefun game.  It was very windy so some of the butterflies flew into the woods.  Oh, well.  It also made all the butterflies that we stuck to the bricks fly off, so I never got a pic of that.  We stuck butterflies everywhere.  On the chairs, the poles, swings, walls, even on some rocks.  That is why I had to cut so many with my Slice machine.

You can see the birthday banner from this party here. Butterfly Barbie cake (some would call her a fairy, but not us because this was not a fairy party) here. Invitations here. And more here.

If this party inspires you, I would love to see it!


Friday, May 27, 2011

Butterfly Dessert Table

Still more to come, but here are the desserts from the butterfly birthday party!

When I was 7 or 8, I had a Barbie cake for my birthday party.  I loved that cake.  (I was just a little disappointed when we pulled the doll out, and it had no legs.  Just a little pick.)  So, I thought how cute would it be to add wings for my seven year old's butterfly party.  My mom made the cake and decorated it.  She outdid herself with this one, I think.  We even added a sparkly butterfly to her updo and rhinestone earrings. 


We bought the butterfly from Ellis Pottery for the wings.  It already had wire picks on it, so we just stuck it into the cake.  Edible fowers from Michael's.  I think this cake would be perfect for a fairy party as well.


With all the fluttering going on, we needed some nectar for refreshment.  It is actually Hawaiian punch and pineapple juice in case you thought we really went out and squeezed some flowers or something crazy like that.  You can admit it.  It's OK.


We put green grapes on skewers to make caterpillars.  The kids had fun eating grapes on a stick.  Cause anything on a stick tastes better right?  I personally think there ought to be more meats on a stick.  (Not really, I just remember that line from one of my favorite movies, "There's Something About Mary.")


Just so you know, these are not really caterpillar eggs.  My mom found a bag of all white Sixlets at Party City.  How cool is that!!  I thought I was going to have to use edible pearls which no one really wants to eat.  But the kids enjoyed these.  After they watched me eat them to make sure they were chocolate for real.  Oh, and the "grass" at the bottom of the jar was edible too.  I wish I could remember where my sister Jackie found that.  It tasted like green apple communion host from church. Just sayin'.


These butterflies were seriously the best gummies I've ever had.  My sister Jena found them at Cracker Barrel.  Don't you LOVE their gift shop??  That may be where Jackie found the host grass.


Maybe it's because I am a science teacher by day, but I thought it was common knowledge that butterflies emerge from a chrysalis.  Apparently not.  I should have labeled the Bugles "cocoons." Cause everyone thought they were crystals and I can't spell.  Seriously?  If you know me, you know I can spell like the dickens.  (I don't really know what that means.  I just know my husband likes to say it for some reason.)  If you've never had Bugles, they are way more salty than a real chrysalis cocoon.


Oh, look.  A butterfly landed on the pixie stick grass.  Also from Cracker Barrel.  Have I mentioned I love their gift shop?  The teeny tiny watering can is from Michael's dollar bins.  I also love all things tiny. Wouldn't these be cute for a garden party??


Tuesday, May 24, 2011

Handmade Butterfly Party Banner

So I know everyone wants to see all of the party pics, but when I realized how many there were, I thought maybe I should do this a little at a time. Plus, it will keep you coming back, right? Right??


Every birthday party has to have a banner and this one is no exception.  This one happens to be my all time favorite.  First, we made lollies according to the directions on Rhonna Farrer's video.  So easy.  Then we cut out letters with my handy dandy Making Memories Slice machine and some butterflies.  (LOTS of butterflies!)  My sister wanted to add a layer of tulle under the letters and the birthday girl added some rhinestone bling to the butterfly bodies.  


I am sure if you have ever photographed a banner, you know how hard it is to take a good picture, because they are so long.  But, let me assure you, this one is CUTE!  It spelled out her name and this one is my all time favorite!  Love the colors!  Love the bling!  Love all the details that make it so sweet!


Photobucket

Friday, May 13, 2011

Handmade Butterfly Invitations

Coming soon-Butterfly Party.  The invitations have gone out, so I can show you these!


These had to be hand-delivered, but most of our guests are neighbors.  I simply left off the stick for the ones that had to be mailed.  Inside the brown cardstock cocoon, is the butterfly invitation.


The party information was printed on labels stuck to the back of the butterfly.  My soon-to-be seven year old traced a butterfly pattern and cut these out herself. The pattern was a page from a chipboard mini album that we got at Michael's from the dollar section. She also picked out the different patterned papers.  The butterfly was rolled up onto a pencil.  Then we pulled out the pencil and rolled the brown cardstock paper around the butterfly roll.  We glued the edge closed with glue dots and glued it to the stick with glue dots.  I am sure hot glue would work as well.


I sprayed the cardstock before rolling with several different colors of Tattered Angels Glimmer Mist.  I liked the way silver looked the best.  It made this look more like a cocoon and less like you know what.  (If you don't know what, my kid will tell you a "t*rd."  Just ignore her.  Please don't encourage that type of language by laughing.)
These are my favorite invitations yet. I totally had fun with this one and I like that my daughter got to help make them this year. 

Linking up at chiconashoestring!


Friday, May 6, 2011

DIY Diaper Cradle II


With so many lovelies coming here to my blog (pinch, pinch) to learn how to make this creation for baby shower gifts, I felt the need to redo the diaper cradle bassinet carriage (whatever you want to call it) how-to AGAIN.  Hopefully, this is much more helpful because I actually took step-by-step pictures.


To make the base of the cradle, stack 15 diapers each in three rows.  Each row is tied with twine or rubber bands.  Tie all three stacks together.


Roll four diapers and rubber band them together.


Place the four rolled diapers on top of the back of the stacked diapers.


Open a diaper and wrap across the top of the four rolled diapers.  Secure with another rubber band.  This completes the structure, next is the accessorizing.  First, choose fabric that coordinates with the chosen decor of the baby shower or baby's nursery. 


To make the skirt, cut a strip of fabric approximately five inches wide, depending on what size diapers you used.  It needs to be long enough to wrap all the way around the cradle twice (so you have enough to go around after it is gathered.)


To make the skirt ruffle, use wide-set straight stitches and pull until it gathers up.  (This is not my lap by the way, it is my sister Jena's who is the one who made this.)


Make a knot with a loop at the end of the string.

This is what the gathered skirt should look like so far.

Tie the two ends of the skirt together tightly.  I do not use hot glue because you want the recipient of your gift to be able to use the diapers.  That is sort of the point, right?
To cover the top, we used a 4 inch wide by 18 inch long piece of fabric wrapped across the top and tucked into the skirt.

Hot glue ribbon onto fabric (this will not touch the diapers.)  For this one, we used two layers of ribbon.


You may need an extra hand for this part because this ribbon is the tightest part and holds everything together.  Make sure the ruffle is exactly how you want it.  Wrap ribbon around the skirt.

Hot glue just the seams together in back. This way you do not get glue on the diapers. 


Glue a knot or bow on top and on the front and congratulate a new or expecting mom!  I made this one for a friend at work.  Welcome Baby Jackson!!  Can't wait to see your face!


Buy Huggies Diapers Here! (I get paid a SMALL fee if you purchase which keeps this blog running. Thanks!)

To make your own you need:
package of diapers (I did not use newborn.)
ribbon
fabric
needle and thread
hot glue and gun
rubber bands

DIY Club
The Lettered Cottage
Chic on a Shoestring Decorating   

”The


Sunday, May 1, 2011

Vintage Italian Chandelier

OK, you know I don't ask for much, but I really need you to go vote for me at Vintage Revivals. I have entered a room makeover contest and I promise to bug you until you vote for me cause I am driving myself (and everyone else) crazy trying to decide how to design this room.  I am number 53 "Brand Spanking New Studio". 
I found this vintage Italian porcelain chandelier at a garage sale this weekend.  (Daniel is hounding me about picking out lighting for "the shop".)  I just about fell out on the ground when the lady selling it told me it was five dollars.  She went on to say "I don't know if it matters, but it was made in Italy."  I thought, um...you had me at 5 bucks!

The problem is I have no idea how to work this into my room, especially since I am not the biggest fan of blue.  My intention was to find a cheap chandelier that could be spray painted and I wouldn't feel bad about it.  But, I think I might feel bad about painting this one. 
So, now you see why I need the help of Mandi Who Loves Our Guts.  She, if anyone, could find a way to make this work.  So thanks in advance for your vote.  Cause you know I would totally vote for you.